Setting Up the Audiom Widget in ArcGIS Experience Builder
This tutorial walks you through adding the Audiom widget to an ArcGIS Experience Builder project using the Esri Building sample map.
Prerequisites
- Access to ArcGIS Experience Builder
- The Audiom widget installed (see installation instructions)
- An Audiom API key
Step 1: Create a New Project
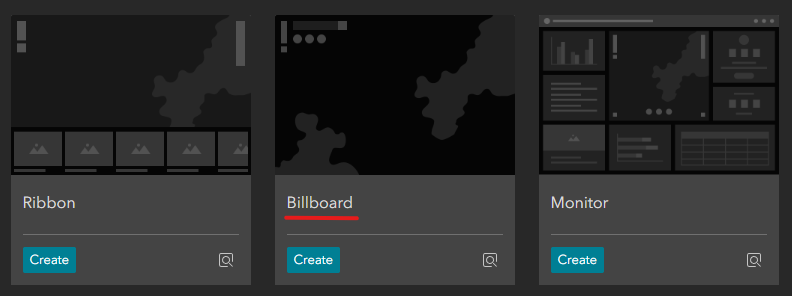
Open ArcGIS Experience Builder and create a new project. In the template selection screen, choose the Billboard template, which provides a full-page layout ideal for map displays.
Step 2: Add the Esri Building Web Map
With your new project open, click on the map component in the canvas or select it from the Page hierarchy panel on the left. In the Content settings panel on the right:
- Click Select map
- At the bottom of the “Select data” window, click Add new data
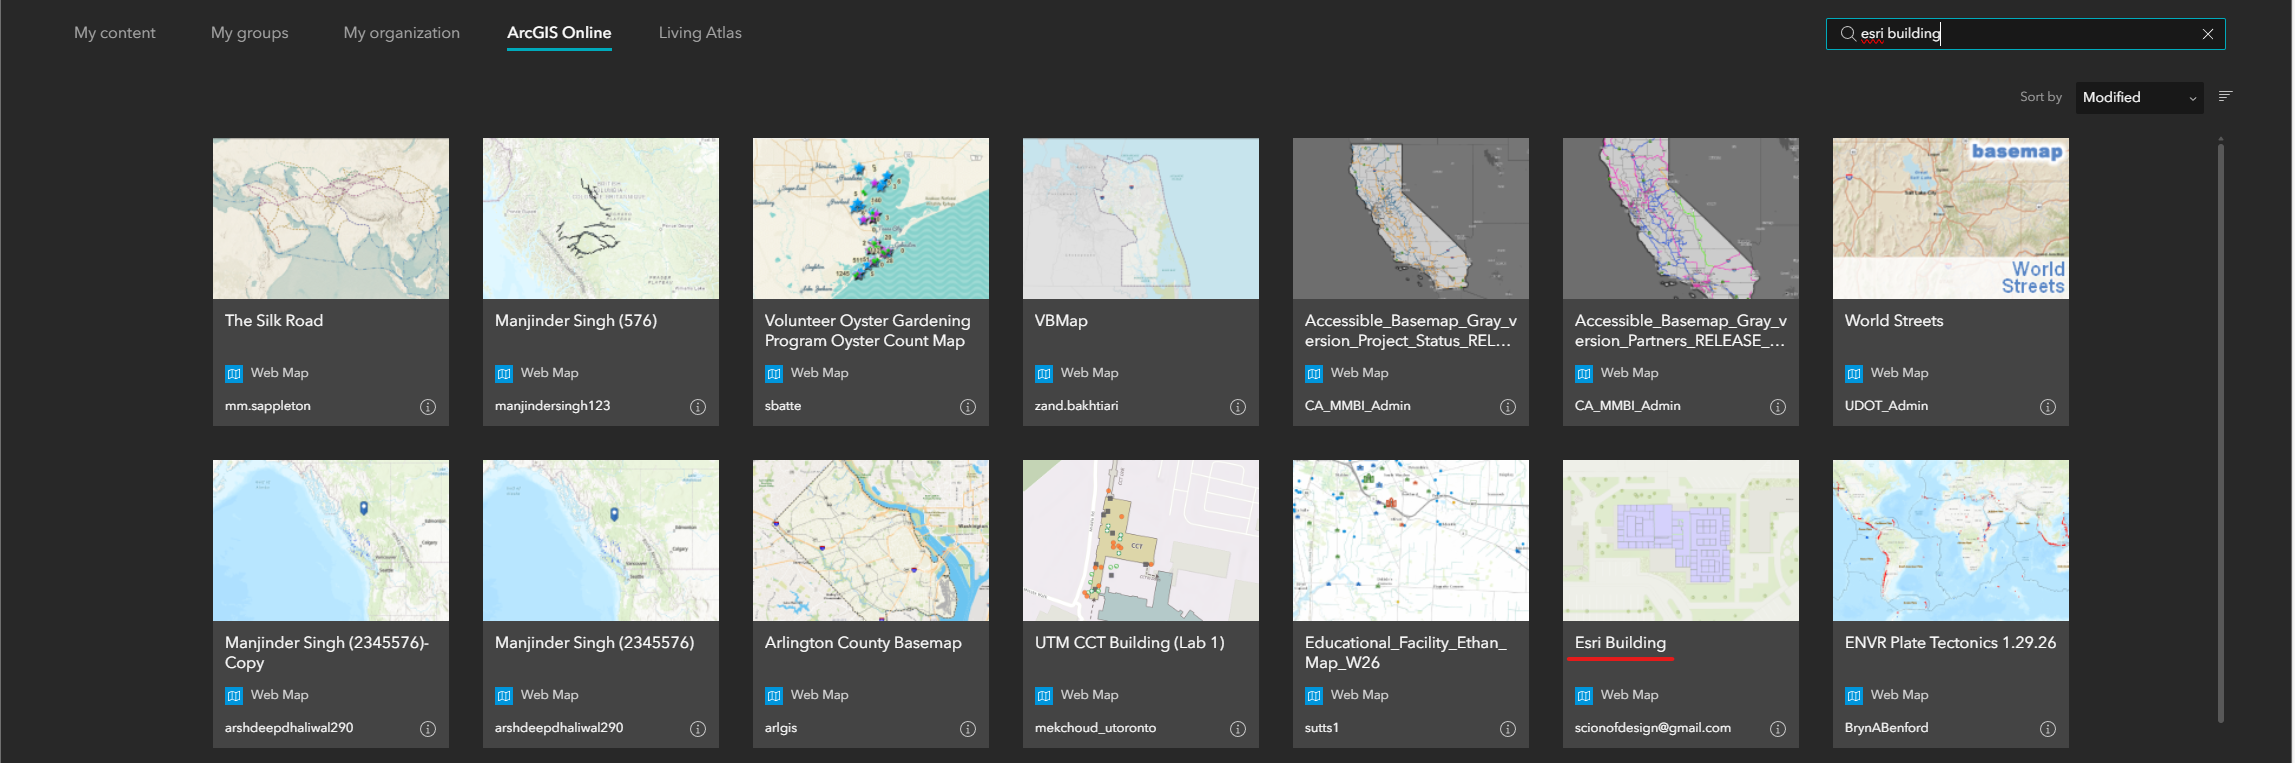
- Search for “Esri Building” in ArcGIS Online
- Select the Esri Building web map from the search results
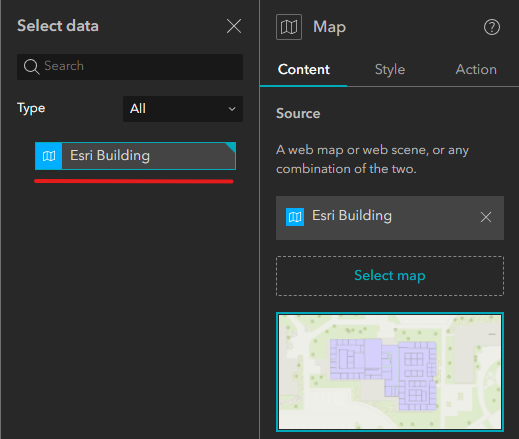
Step 3: Select the Map Data Source
After adding the Esri Building map, it will appear in your available data sources. In the Select data panel, click on the Esri Building option to assign it to your map widget.
Step 4: Unlock the Layout
Before repositioning widgets, you need to unlock the layout. In the header bar at the top of Experience Builder, locate the Lock layout toggle and turn it off. This allows you to resize and reposition widgets freely.

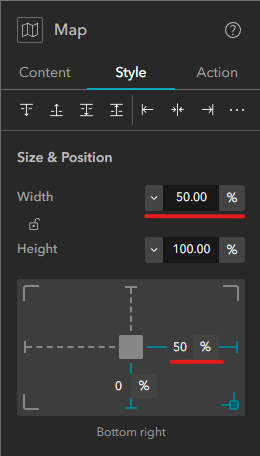
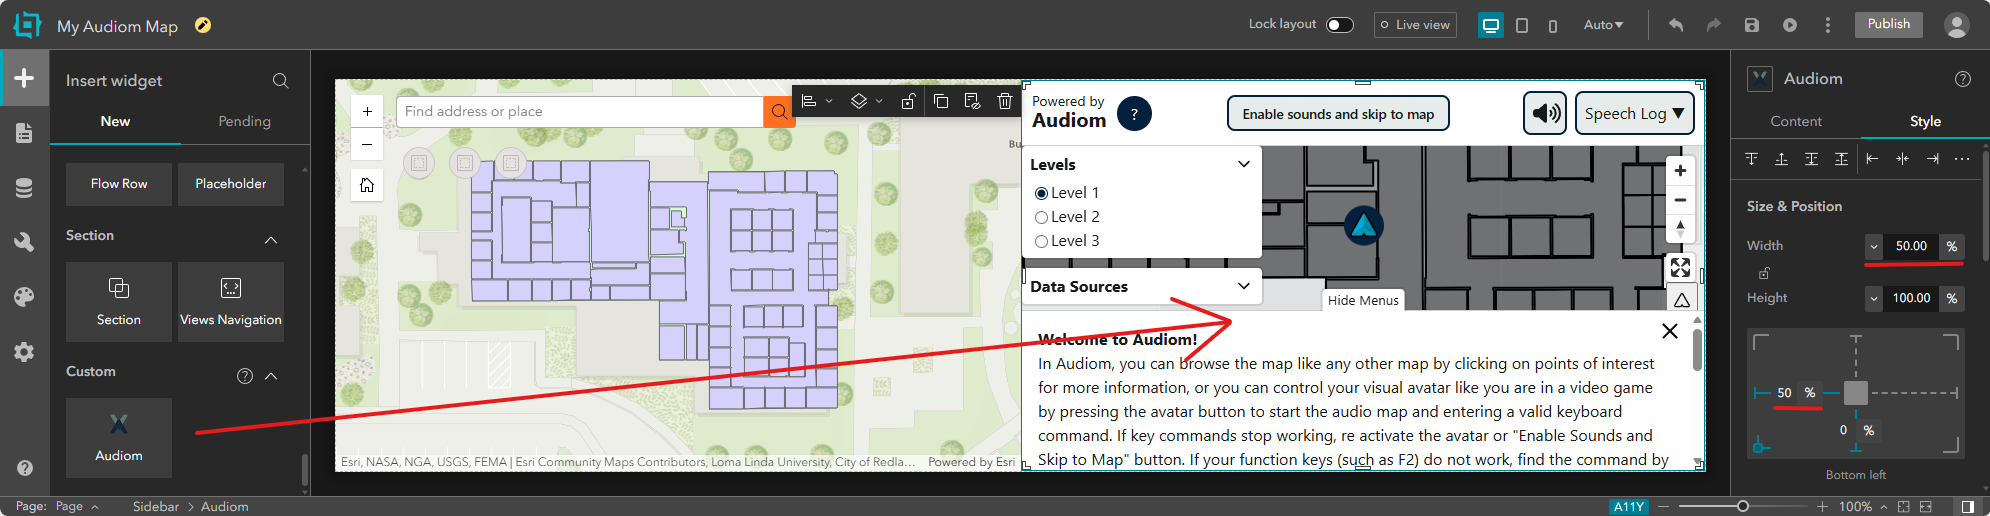
Step 5: Resize the Esri Map Widget
With the Esri map selected, open its Style settings panel. Adjust the following properties to make room for the Audiom widget:
- Set Width to 50%
- Set the From right margin to 50%
This positions the Esri map on the left half of the screen.
Step 6: Add the Audiom Widget
Switch to the Insert view using the tab at the top of the left panel. Scroll down through the widget list to find the Audiom widget. You can either:
- Drag and drop the widget onto the canvas, or
- Select it and press Enter to add it
Once added, click on the Audiom widget in the canvas or select it from the Page hierarchy. In its Style settings:
- Set Width to 50%
- Set the From left margin to 50%
This positions the Audiom widget on the right half of the screen, adjacent to the Esri map.
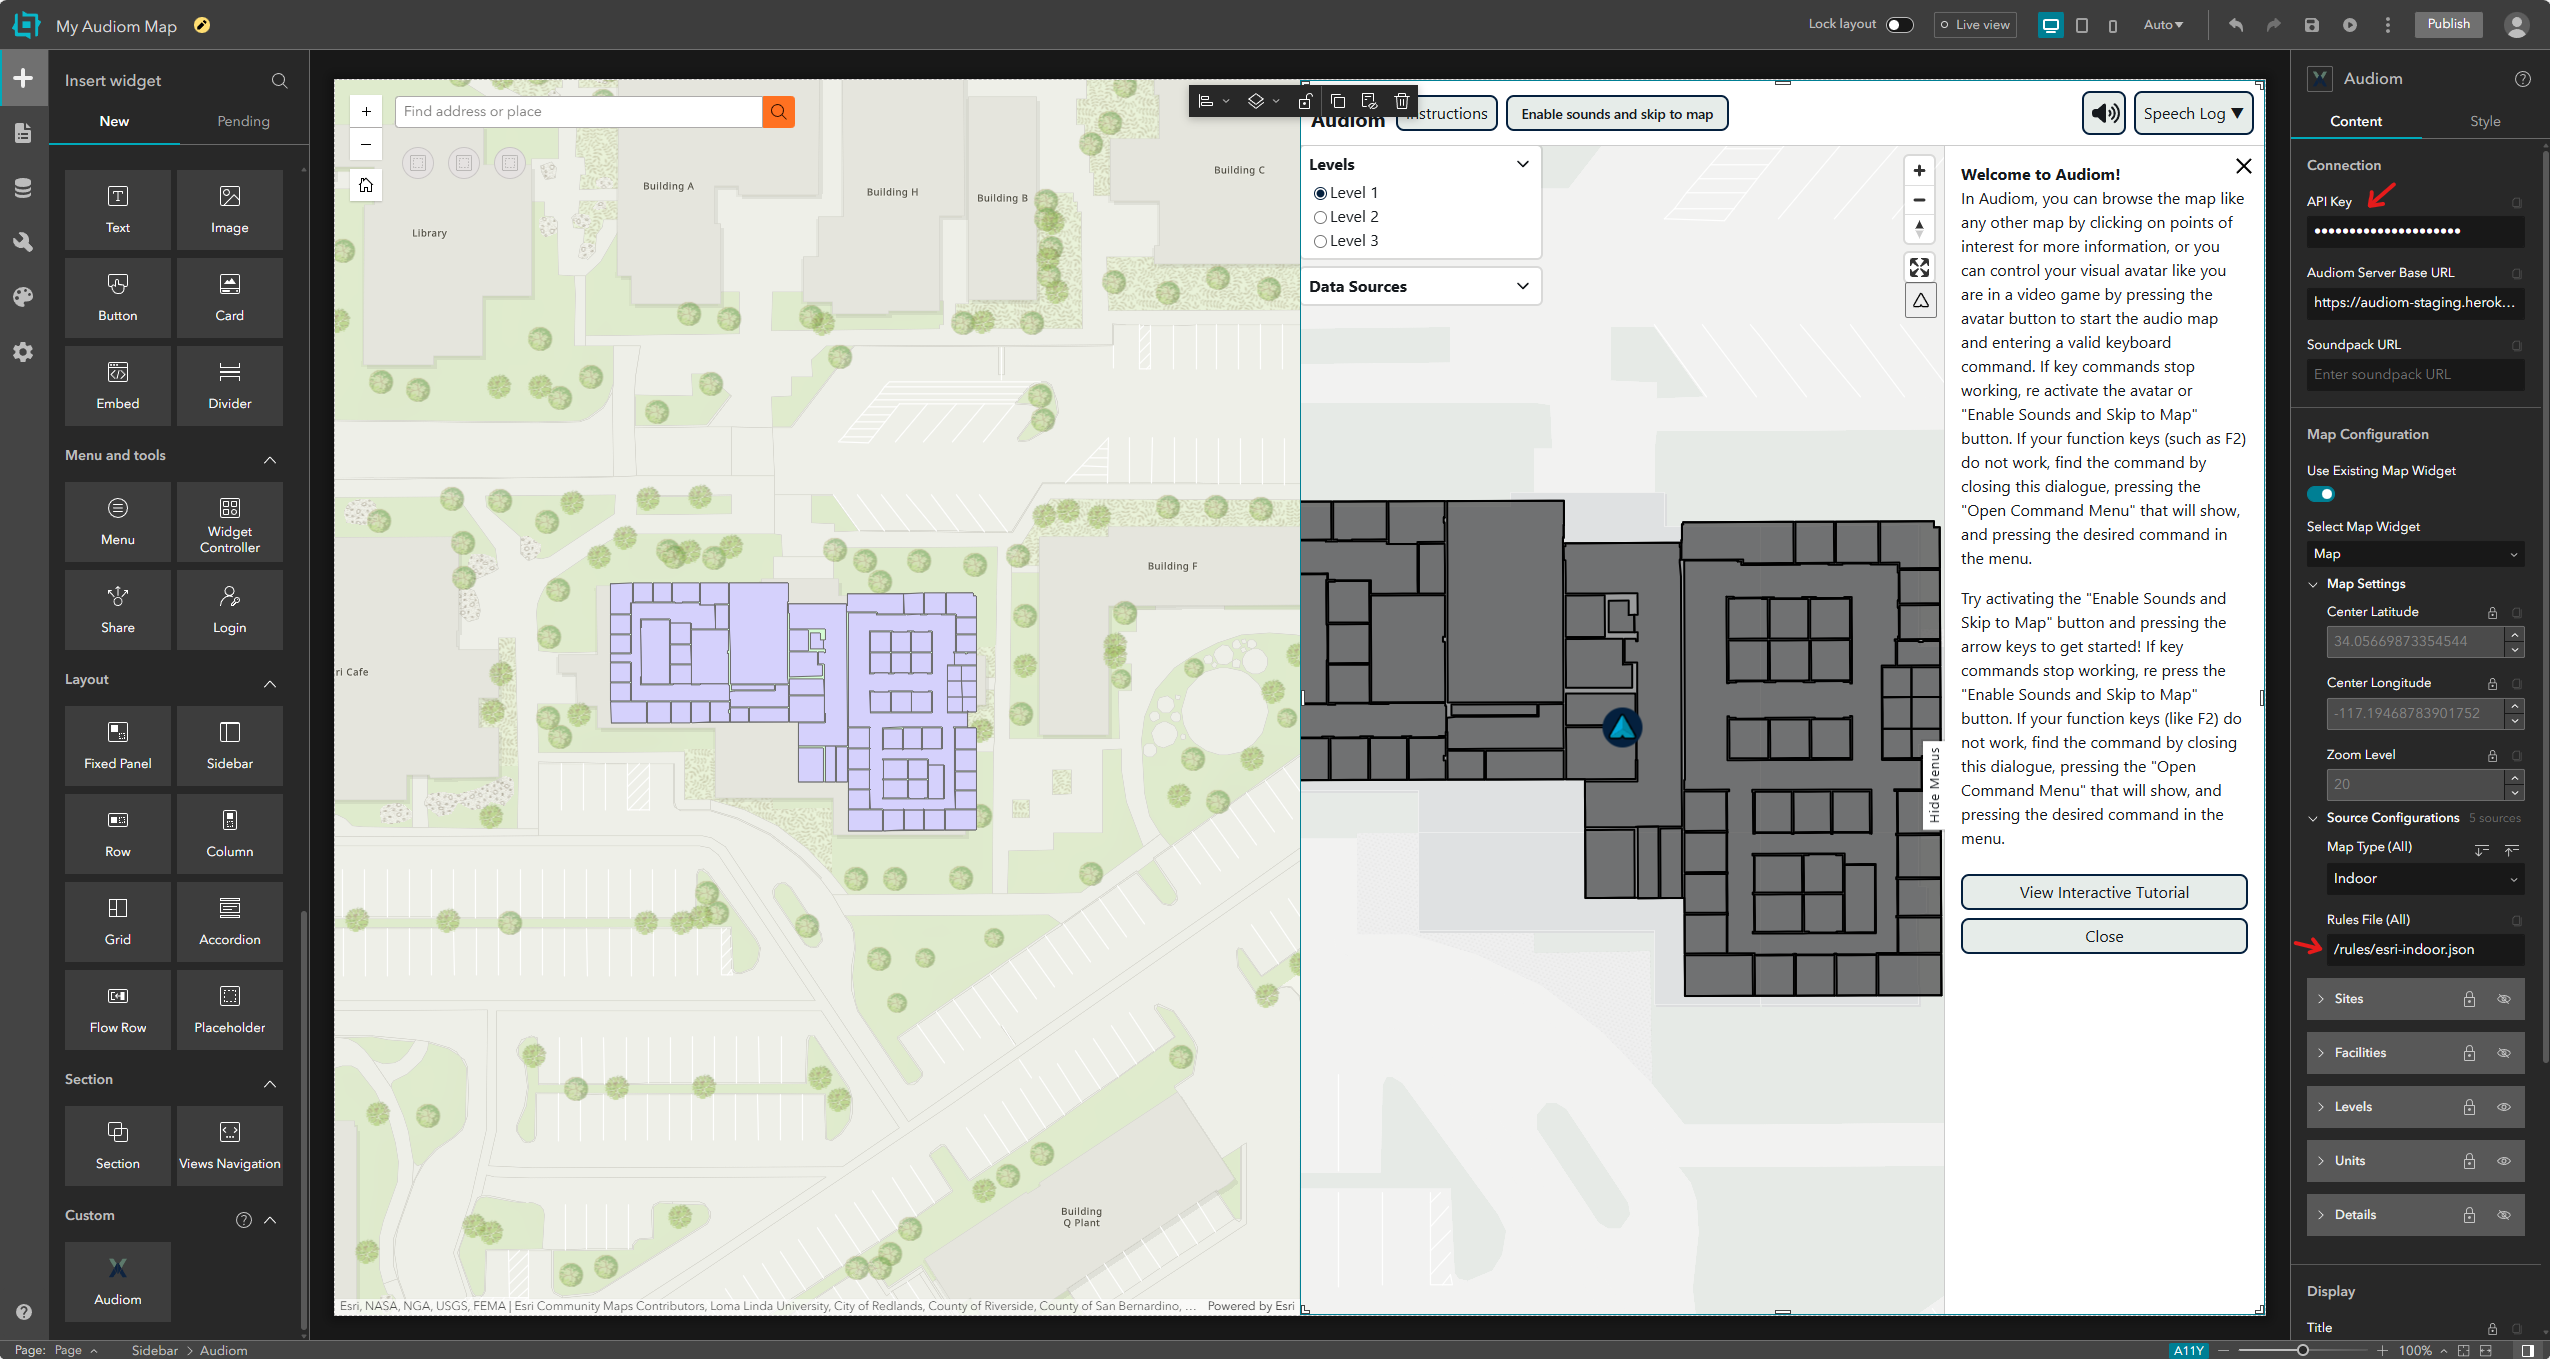
Step 7: Configure the Audiom Widget
Click on the Audiom widget and open its Content settings panel. You’ll notice that the widget has automatically synced with the Esri map:
- The initial view settings (center coordinates, zoom level) are populated
- All individual map layers from the Esri Building map are listed
To complete the configuration:
- Enter your API Key in the designated field
- Under Source Configurations, locate the Rules File (All) setting
- Set it to
/rules/esri-indoor.jsonto enable proper object labeling for indoor maps
Next Steps
After completing these steps, your Experience Builder project will have a synchronized Audiom widget that provides accessible audio navigation and descriptions of map features. You can:
- Publish your experience to share it with others
- Customize additional Audiom settings as needed
- Integrate Audiom seamlessly into your existing maps
For more information on embedding Audiom in using the built-in Embed widget, see the embedding documentation.